I’ve worked on and off with Linux for years. All of it using Linux as a web server. Generally I am most comfortable using Windows as my dev environment, although I love Mac too.
Lately I’ve wanted to develop web apps in a Linux environment using Linux-based tools and then deploy those to a Linux server. I haven’t bothered yet to go purchase a bunch of super fast USB 3.0 storage yet so I looked at creating a Linux VM in Azure and using that instead.
Note: I should note that I started this process by searching for existing information on how to do this. However, what I found either didn’t work or forced me to do something I didn’t want (i.e. install Cyg-Win and use X-Windows, or install vncViewer, etc.). A number of blog posts I found missed a couple of key pieces of info that tripped me up as I followed them. The best topic I found on doing this was this one on Ubuntu Tutorials, Remote desktop to Ubuntu 12.04 from Windows 7. I want to make sure I cite this as the source (there is no author unfortunately or I would credit that person out directly) I used that was clearly written and actually worked.
Ok, with that out of the way, let me walk you through the steps I followed to create a desktop Linux environment using a Linux VM in Azure.
Step 1: Provision a Linux VM
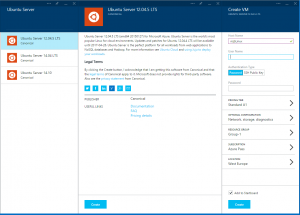
Fire up the Azure Management Portal and provision a new Ubuntu VM. Since our purpose here is to enable an interactive remote user login to this VM we we are going to specify a user name and strong password rather than a SSH key.
Note: This is super critical and its where I got tripped up using information I found online. You have to use 12.04 LTS. I tried 14.04 and despite numerous attempts I could not get it to work. (Update: Apparently this works with 15.10 per a comment below)
Step 2: Selecting VM Instance Sizes
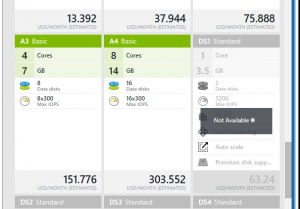
While provisioning your VM you will need to select a VM size. You may be tempted to create a small VM because after all it’s not doing much. Don’t do this. I tried this using a small VM and screen refreshes were painfully slow. (Move the mouse and go grab a coffee slow) Medium was better but still unusable as a desktop. You need a VM with lots of CPU power to handle screen draws. I selected a Basic Large because I don’t need load balancing or other features. Yes it costs $300/month but I don’t need to run this 24/7. I have it running at most 30 hours a month so that’s less than $15 a month.
Step 3: Open the Remote Desktop Protocol Port
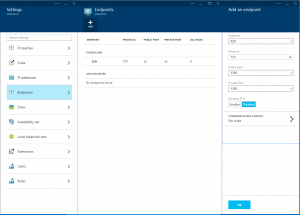
After the VM has been successfully provisioned you need to open the right port so you can connect to it via RDP. To connect to the VM using RDP, open port 3389. To do that click on Properties for the VM in the Azure Management Portal, select End Points and then you create an end point in the Azure Portal.
Note: you can change the port you use for RDP if you want but you will need to edit the xrdp.ini file in your Linux VM after you install RDP. To do that SSH into the VM and navigate to /etc/xrdp/xrdp.ini and edit the Port number, it’s at the end of the file. Save the file, quit VIM and then reboot the VM to ensure it’s listening on the right port.
Step 4: Connect via SSH
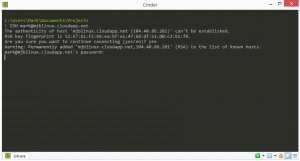
After the VM is ready you need connect to it so you can update apt-get, install a desktop environment and install RDP. In the old days one would use a utility like PuTTY to provide Windows users a UNIX/Linux command shell from which you could connect to remote Linux machines and do stuff. However, if you have Git Bash installed you already have everything you need. Just open Git Bash and type the following:
ssh username@mylinuxvm.cloudapp.net
Tip:There is also another tool that if you aren’t using you should called ConEmu. This is by far the best shell I’ve ever used. It replaces the Windows shell, GitBash, and PowerShell with a single app. Go install it now. I’ll wait.
So next fire up the ConEmu shell and SSH into your new Linux VM.
Step 5: Update apt-get
Once connected you need to update your VM’s package repository to make sure it has the latest references for software packages available and their dependencies. This is a critical step. Your installations will fail otherwise. To update apt-get, at the SSH prompt enter the following below, then go get a coffee. This can take about 5-10 minutes to run.
sudo apt-get update
Step 5: Install a Linux Desktop
With that complete you can now install a desktop package. There are a number you can choose from, I am really becoming a big fan of XFCE. It is extremely light weight and takes minutes to install versus Ubuntu Desktop which is a beast and includes things like Libre Office and other stuff I don’t need and can take up to an hour to download and install. To install XFCE, enter the following:
sudo apt-get install xfce4
Step 6: Install RDP on Linux
With your desktop successfully installed you can now install RDP on the Linux VM. To install this simply type:
sudo apt-get install xrdp
Step 7: Open the Windows RDP Client
We now have the RDP service running on Linux and a desktop into which we can log into. Next open the Remote Desktop Connection in Windows and type in the host name of your VM.
Tip: Be sure to type in the name you used when you created the VM and click “Save” under Connection Settings. If you don’t do this Windows will stubbornly try to log you in to the VM using your cached Windows credentials.
Step 8: Login
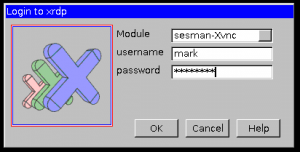
Next click Connect in Windows RDP client and enter your Linux VM password in the dialog shown here.
Note: If you’re seeing your cached Windows credentials in the username, hit cancel and go back to the RDP client in Windows and enter your user name again and then click, Save.
Step 9: Enjoy your new Linux dev machine
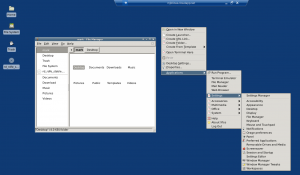
And that’s it. If you’re using XFCE you’ll see this when you first log in. Just select Use Default Config.
You can then begin customizing your desktop environment, installing other packages, applications, etc. and start using your VM as a Linux dev environment.



Instead of opening RDP to the world, would it be better to use an SSH tunnel to connect to RDP? Then the entire connection could be encrypted using a slightly higher key strength by default.
I had not considered that. It’s long bothered me SSH was not better supported on Windows. An easy mitigation is changing the port to a higher, ephemeral port. Most people do this today.
One sure way to mitigate this, and a benefit of running it in Azure is to set up a Virtual Network, create the VM within that without a public IP address and then create a VPN Gateway between yourself and your Linux VM running RDP. https://msdn.microsoft.com/library/azure/dn133792.aspx
Simple, clear and straight to the point. Thank you
You wrote> You have to use 12.04 LTS
FYI, your instructions worked fine on Ubuntu 15.10.
Thx and Regards, Todd
Awesome. That distro wasn’t available yet when I wrote this but glad this works on newer distros.
thanks.
Hi,
I’ve followed this tuto and i have a access problem to the Remote Desktop Connection. On the classic portal, we needed the cloud service (Cloudapp.net), the VM’s name and the public port (64381). In the new azure portal, we don’t have cloud service anymore and when i put the ip address and the port, it does nt work. I need help please.
tried this with a new Debian VM in Azure. Installed lxde then xrdp. Launched RDP from Windows and put in the IP of the VM. It won’t connect.
What could I be missing?
This worked perfectly for Ubuntu Server 16.04 LTS.
To open up the RDP port, you have to find the new location since that has moved so check out this URL for it: http://stackoverflow.com/questions/31965713/how-i-add-new-endpoints-to-my-vm-on-new-azure-portal-preview. I found it by using the “All Resouces” and searching for my machine name. For example mine was MACHINENAME-nsg. Then click on Inbound Security Rules.
I used the IP address for the RDP server name.
The default browser didn’t work so follow these steps to get Chrome installed
wget https://dl.google.com/linux/direct/google-chrome-stable_current_amd64.deb
cp google-chrome-stable_current_amd64.deb /var/cache/apt/archives
sudo apt-get -f install /var/cache/apt/archives/google-chrome-stable_current_amd64.deb
Hi,
I followed all the steps mentioned above. But When I try to enter computer name or IP address I am unable to connect. It throwing an error saying that.
Remote Desktop can’t connect to the remote computer for one of the reasons.
1. Remote access to server is not enabled
2.Remote computer is turned off.
3. Remote Computer is not available on the network.
As I am new to Linux Environment, But, I tried all possible cases like disabling the firewall, but that did n’t help.
Any quick response would be much appreciated. please help me out…..
It’s super tricky to debug why you are not able to connect but we do have a feature called Network Watcher that I think could help you diagnose why you cannot connect. Go check it out here and give it a try.
https://docs.microsoft.com/en-us/azure/network-watcher/network-watcher-connectivity-portal
Thanks.